
How to Escape Predators in FERAL Animal Survival
Break a hunter's chase in FERAL Animal Survival: run for water, dive under with E and Q, fight back mid-chase, and use night vision and the territory map to spot danger early.
Quick answer
When a hunter starts chasing you, sprint straight for the nearest water. In an observed chase, the pursuer stopped at the water's edge and gave up instead of following the fleeing animal in, which ended the pursuit. Once you are in the water, hit dive to get underneath the surface: E takes you down and Q brings you back up.
- Every animal in the valley is either the hunter or the prey, so as a prey animal you are always a potential target.
- Attackers in observed play did not grab animals that fled into water.
- If water is out of reach, fight back while you run — a juvenile deer rammed a hunting wolf repeatedly during one recorded chase.
- If your animal dies to an attacker, you come back as a baby animal, so staying out of reach protects the growth you have built.
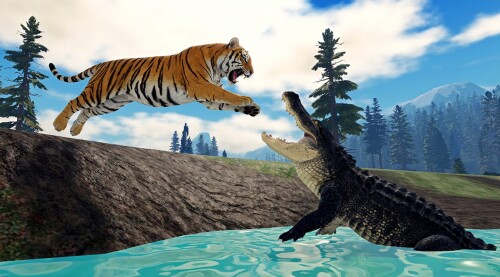
FERAL Animal Survival splits its valley into two roles: every animal is either the hunter or the prey. If you are playing a prey animal, there is no moment when you stop being a potential target — any hunter nearby can decide you are worth chasing. The reliable counterplay comes down to three things: how to break a chase, what an attack does to you if it lands, and how to notice danger before it gets that far. This page walks through all three, starting with the escape that works.
Run for water first
Water is the escape destination that actually ends chases. In one recorded chase, the fleeing player made a desperate run for a pond — close enough to make it, but only just — and the pursuer stopped at the water's edge rather than following, which ended the pursuit on the spot.
The same pattern showed up elsewhere. When an attacking land animal chased a river otter into water, it could not grab the otter there, and the otter player deliberately fled into water again and again as the safer position. One player went as far as planning their route around it, heading for Glacier Lake near Thunder Falls because, in their words, "I think it's safest to be in water."
Keep the limits of that evidence in mind: these are observed outcomes from play, not a stated rule that water makes you untouchable. But the practical pattern is consistent — land pursuers did not follow their target in, and the advantage is clearest when the chaser is a land animal and you are the one that can swim.
Once you are in the water, use it. Animals can swim, and hitting dive takes you underneath the surface, with Q to go up and E to go down. Those controls were demonstrated with a river otter in a river, and they apply while you are in the water.
The whole escape is short:
- Sprint for the nearest pond, lake or river the moment the chase starts — in the recorded chase the animal barely reached the water, so do not detour.
- Keep going until you are actually in the water, not just near it.
- Hit dive to drop underneath the surface, then press Q to come back up when the coast is clear.
If you struggle to find reliable water, the how to find water guide covers locating it.
Know what a landed attack costs you
Escaping quickly matters because attacks in this game leave lasting damage:
- Limp. A landed attack can inflict a limp — one player who inflicted one put it plainly: "I made him limp. Now, he can't move." A limped animal is effectively disabled and unable to move, which takes your legs out of a chase.
- Bleed. Attacks can also leave a target bleeding and taking damage over time after the hit — one player watched a bitten snake keep losing health well after the strike.
- Death. If your animal dies to an attacker, you are back to being a baby animal again. A wolf player killed by an attacking otter came back as a baby, giving up the growth stage they had reached. The baby survival guide covers starting over, and the growth stages page explains the path back up.
Fight back when water is out of reach
Prey animals can hit back. In one observed hunt, a juvenile deer being chased by a wolf rammed into the hunting wolf again and again while running, and the wolf found it could not lunge again mid-fight — the lunge attack has a cooldown, and you cannot repeat it immediately after using it.
That cooldown applies to every lunge, including your hunter's: a hunter that just lunged cannot throw another one straight away. Fighting back is not a guaranteed win, but the deer example shows that even a younger animal can punish a chasing hunter and buy itself distance. If you are the one doing the lunging, the same rule limits you, so plan around it.
For a closer look at both sides of these encounters, see the wolf guide and the deer guide.
Spot the hunter before the chase starts
The cheapest escape is the one you never have to make:
- Night vision highlights other players inside the map, making them easier to find — one player called it really good for finding different players, which makes it just as useful for noticing another animal moving toward you.
- The territory display shows which territories are contested and which are not, and you can zoom in on this map view before you settle in somewhere.
- Leave risky ground early. In one session, a player feeding in a pond spotted an adult cougar near their food and moved out of the pond to relocate somewhere else rather than staying — a young animal does better somewhere the adult predators are not.
The map guide and the predators and prey overview go deeper into where danger concentrates.
Match the response to the moment
Decision guide
Escape, fight or relocate — all three beat standing still. If you are early in the game and still learning the valley, the beginner guide puts survival, food and water together in one place.
Related Guides
Predators and Prey
See which animals hunt, which are prey, and how your hunter or prey role changes the way you play.
How to Find Water & Drink Quests
Where rivers, the hidden lake and named spots hold water, plus how drink quests pay Amber while your animal rehydrates.
Valley Map & Areas
The valley's named areas — Den Hollow, Alder Creek, Tall Marsh and more — and how to navigate between them.
Revive Guide: All Revive Products
All five revive products with prices, what death does to your animal, and which revive option fits your situation.